Backyard Privacy Ideas: How to Block Views and Reduce Noise

Dusty Rhodes • June 30, 2025


Backyard privacy does not mean sacrificing style and comfort. Simple backyard privacy ideas like incorporating tall fences, dense evergreen plantings, and strategic placement of outdoor structures like gazebos can significantly enhance backyard privacy. A well-designed private backyard not only provides a comforting space but can also significantly boost your property’s value and curb appeal, all while offering a greater sense of security. Having a private backyard space is a dream for many homeowners. It’s where you can unwind, entertain, or simply enjoy nature without feeling exposed. In this Redfin article, we’ll explore a variety of effective backyard privacy ideas that can help you create your perfect personal space, no matter if you’re in Boulder, CO, or Fort Worth, TX.


1. Use plants to create natural privacy


People often associate backyard privacy ideas with unattractive features; however, one of the most natural and beautiful ways to create privacy is with plants. Think beyond a simple fence and consider a living screen. Not only do plants help with making your garden beautiful, but actively shelter your space from unwanted eyes.


Expert tip from The Mulch Mound: A great private outdoor space starts with well-designed mulch beds—they’re not just practical, they’re the foundation of a polished, peaceful yard. Deep, curved mulch beds lined with clean edging help define zones and guide the eye, making your space feel both organized and expansive. Layering tall shrubs and ornamental grasses within those beds adds natural screening without sacrificing style. For extra privacy, tuck seating areas behind mulch-lined plantings or use trellises with vines to soften fencing. Thoughtful mulch use keeps everything low-maintenance while tying together the look and function of your outdoor retreat. 


Additional suggestions and ideas for creating a natural privacy wall include purchasing the following:

  • Tall shrubs and trees: Fast-growing evergreens like Leyland cypress or arborvitae can quickly create a dense visual barrier. Deciduous trees like maples or oaks offer seasonal privacy and shade.
  • Vines on a trellis: Climbing vines like wisteria, trumpet vine, or clematis can rapidly cover a fence, trellis, or pergola, adding a lush, green wall to your space.
  • Bamboo: Certain types of bamboo, especially clumping varieties, can grow tall and dense, offering a tropical and effective privacy solution. Just be sure to research the best types for your climate and consider root barriers for running varieties.


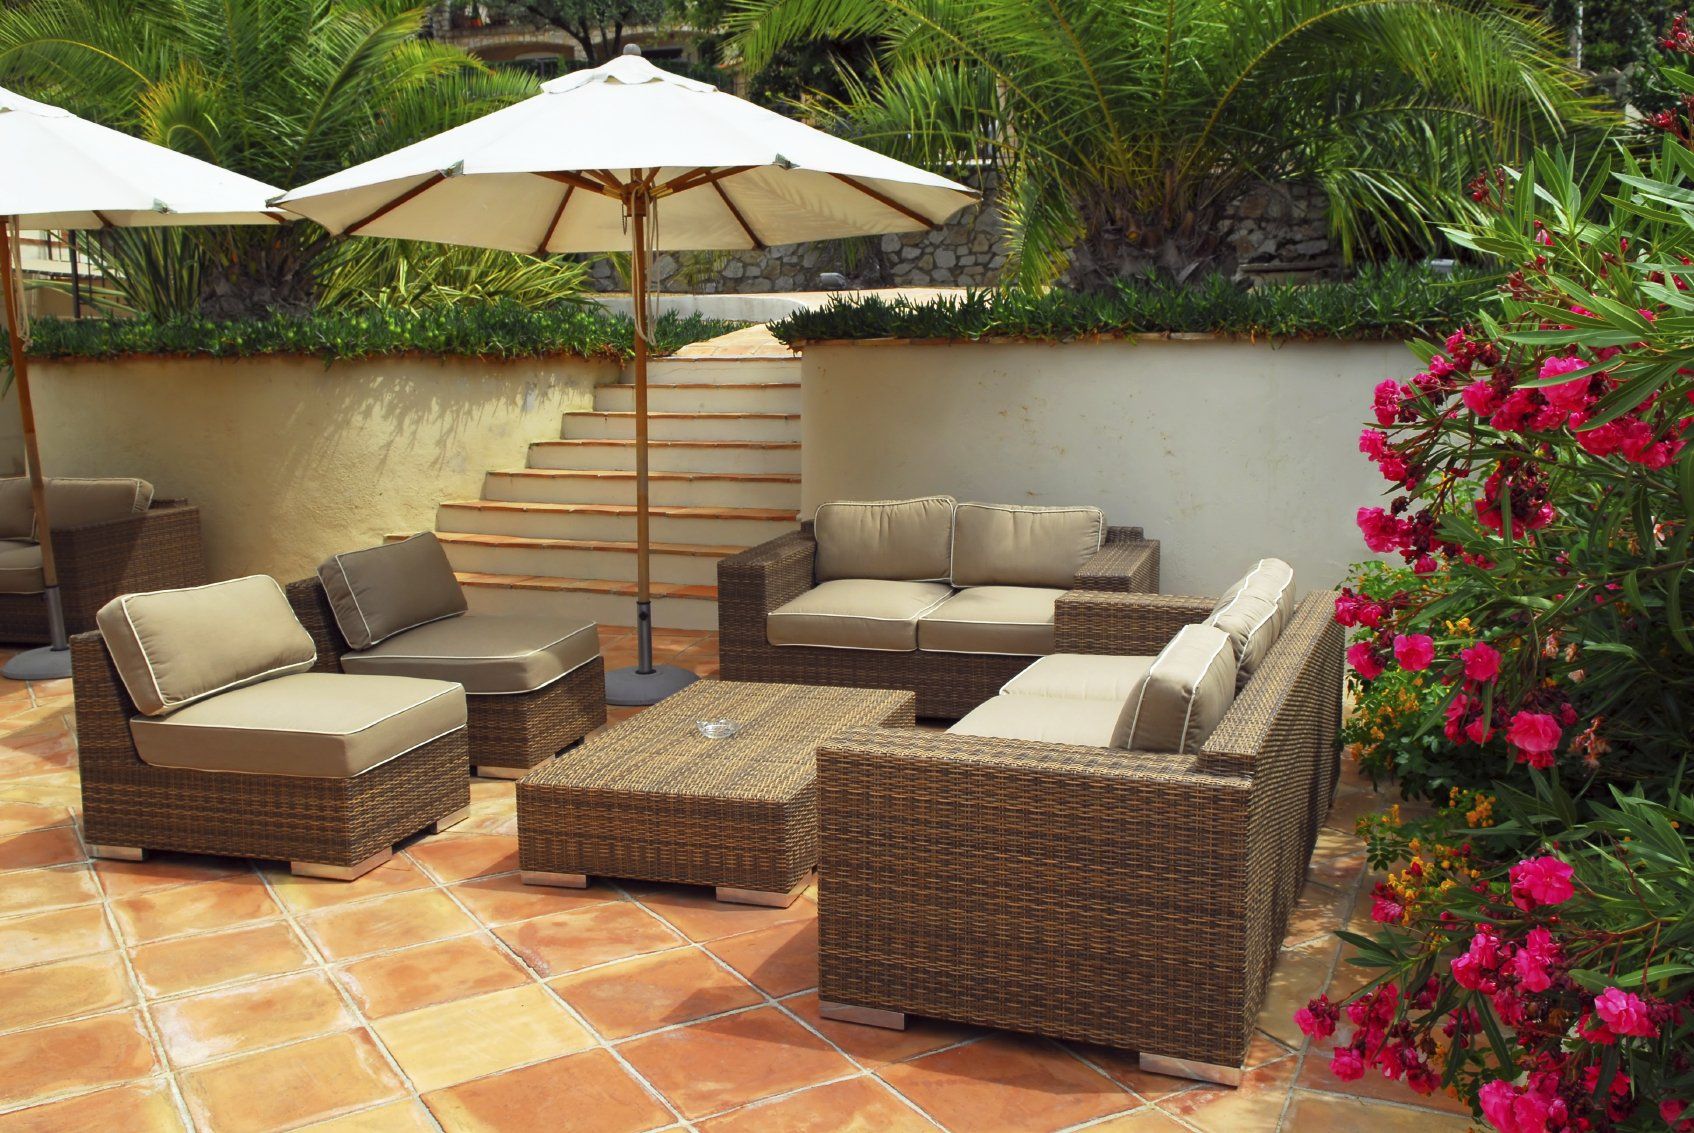
2. Add outdoor structures for built-in seclusion


Outdoor structures offer more than just shelter; they can enhance privacy in your outdoor space. These structures provide a framework upon which you can build a more secluded environment. By thoughtfully integrating them into your backyard design, you can create distinct zones that feel intimate and protected from outside views.


Pergolas, gazebos, and even shed walls offer more than just shelter; they can be excellent privacy enhancers for your outdoor space.


Expert tip from Tommy Pollina Landscape: “A great private space doesn’t just block views — it feels calm, tucked away, and thoughtfully put together. We like to blend privacy fencing or masonry walls with natural screening like evergreens, tall ornamental grasses, or layered shrubs. This creates a barrier without making the space feel boxed in. Features like trellises, pergolas, or plant-covered arbors can give you cozy, secluded spots within the yard that still feel open and inviting.”


Consider these structural privacy boosters:

  • Pergolas with curtains: Add flowing outdoor curtains to create a flexible, intimate retreat.
  • Screened-in gazebos: These create a private outdoor room perfect for dining or lounging, without worry about bugs or prying eyes.


3. Try stylish and strategic privacy screens

Standalone screens crafted from materials like wood, metal, or even repurposed items are perfect for blocking specific sight lines. Beyond their functional benefits, these screens can also serve as stylish additions to your yard’s aesthetic.


Add character with planters or shelving

Consider screens with integrated planters for a living wall effect, or those with built-in shelving to display outdoor decor and lighting, further enhancing their aesthetic and utility. The material choice itself can dictate the style. Aluminum offers a modern edge, while reclaimed wood provides a rustic look.


Use strategic placement to define outdoor zones

When integrating privacy screens, think about their strategic placement to maximize both privacy and visual appeal. Instead of just blocking an undesirable view, consider how a screen can define an outdoor “room” or create a captivating backdrop for a seating area or garden bed. For instance, a series of smaller, complementary screens can be used to create a meandering pathway, subtly guiding the eye while maintaining seclusion. You can also use them to visually separate different zones within your yard, such as a dining area from a lounging space, giving each its own distinct ambiance.


Go portable for adaptable privacy

Portable decorative screens offer incredible flexibility. These can be moved around as needed to provide privacy for impromptu gatherings, block sun glare, or simply refresh the look of your patio. Imagine screens with wheels for easy repositioning, or lightweight foldable designs that can be stored away when not in use. The key is to see these screens not just as barriers, but as dynamic design elements that can transform your backyard into a personalized sanctuary. 


4. Choose fencing that adds both beauty and function


Fences and walls are classic backyard privacy ideas that don’t have to be boring. Increasing your backyard privacy can be easily achieved with a tall fence, provided your budget and space permit. With numerous styles and heights available, you’re sure to find one that works for you and your home.

Tip from Veronica Nguyen of Pentagon Fencing: A great private outdoor space seamlessly blends privacy, beauty, and functionality.” She continues suggesting, “When it comes to fencing solutions, I recommend tall, solid options like Colorbond Fences or Modular Walls for both durability and visual appeal. Modular walls are an outstanding choice. Not only do they offer a sleek, modern appearance, but they also provide excellent acoustic insulation, helping to block out street noise and enhance the feeling of seclusion. Modular walls and Colourbond fences are also highly durable, low maintenance, and come with a variety of stunning colors to suit any home style. Pairing both Colourbond fences or Modular Walls with greenery or vertical gardens softens the structure, creates a resort-like atmosphere, and adds a natural buffer. Strategic layout is key, so using screens or pergolas to section off seating or BBQ areas for a more intimate feel is an ideal combination. Additionally, integrating up/down LED lights will cast a soft glow along the surface of modular walls or slat fences, creating a sleek, modern look while highlighting textures and finishes. These are perfect for evening ambience and curb appeal.


Other stylish fencing options include:

  • Wood fences: Stain or paint them to match your home, or add lattice or custom cutouts for personality.
  • Gabion walls: Wire cages filled with rock or brick offer a modern, industrial look and help reduce sound.
  • Corrugated metal panels: Durable and edgy, these are low-maintenance and make a striking statement.
  • Combine fences with greenery: Add vines, planters, or vertical gardens to soften the structure and create a resort-like vibe. Strategic lighting can also highlight textures and boost nighttime curb appeal.


5. Incorporate elements to reduce noise

Achieving sound privacy in your backyard is just as important as visual privacy for creating a private retreat. Unwanted noise from neighbors, traffic, or urban environments can disrupt your peace and make it difficult to relax or entertain outdoors. While physical barriers like fences can block some sound, they often aren’t enough to create a quiet atmosphere. Strategically incorporating elements that absorb, block, or mask sound, you can transform your backyard. 


Use white noise:

One of the most effective ways to enhance sound privacy is by introducing white noise. The soothing sound of water features can be incredibly effective at masking undesirable external noises. Fountains, with their gentle trickling sounds, can create a calming ambiance and help to muffle distant sounds. For more substantial noise reduction, consider larger water features like waterfalls or bubbling rock formations, which produce a greater volume of white noise. Joe Sexton from Inch Calculator suggests that incorporating water features can elevate the ambiance by masking noise and creating a relaxing retreat. Joe writes, “Elevate the ambiance by incorporating water features or outdoor speakers to mask noise and create a relaxing retreat.”


Layer in natural sound barriers:

Another approach to improving sound privacy involves utilizing dense plantings and thoughtful landscaping. While plants primarily offer visual screening, thick hedges, layered shrubs, and tall ornamental grasses can also help to absorb and diffuse sound waves, creating a quieter environment. Combining these natural elements with other structures can further enhance their sound-dampening capabilities. Veronica Nguyen of Pentagon Fencing recommends pairing fences, like Colorbond Fences or Modular Walls, with greenery or vertical gardens, noting that this combination softens the structure and adds a natural buffer. Additionally, elements like gabion walls, which are made from wire cages filled with rocks or bricks, are excellent at providing both visual privacy and sound dampening due to their dense material.


Reposition furniture and structures:

Finally, consider the strategic placement of outdoor structures and furniture to help create a more sound-protected area. Modular walls, for instance, are highlighted for their excellent acoustic insulation, which helps to block out street noise and enhance the feeling of seclusion. Draping a pergola with outdoor curtains can offer flexible privacy, allowing you to close them for an intimate atmosphere, which can also help to muffle sounds. Similarly, a screened-in gazebo creates a private outdoor room ideal for dining or lounging without concerns about external noise. By layering various sound-dampening techniques, you can effectively minimize disruptions and maximize the peace and quiet in your backyard.


A final note on backyard privacy ideas


As we’ve explored, creating a private backyard doesn’t mean sacrificing style or comfort. By thoughtfully integrating features like tall fences, dense evergreen plantings, and strategically placed outdoor structures, you can enhance your backyard’s privacy. Well-thought-out backyard privacy ideas provide a comforting space for relaxation and enjoyment. A home is meant to be your sacred area, and with these ideas, you’re on your way to creating the peaceful outdoor space you’ve always dreamed of.


Source: Redfin


Dusty Rhodes Properties is the Best Realtor in Myrtle Beach! We do everything in our power to help you find the home of your dreams. With experience, expertise, and passion, we are the perfect partner for you in Myrtle Beach, South Carolina. We love what we do and it shows. With more than 22 years of experience in the field, we know our industry like the back of our hands. There’s no challenge too big or too small, and we dedicate our utmost energy to every project we take on. We search thousands of the active and new listings from Aynor, Carolina Forest, Conway, Garden City Beach, Longs, Loris, Murrells Inlet, Myrtle Beach, North Myrtle Beach, Pawleys Island, and Surfside Beach real estate listings to find the hottest deals just for you!

Share

By Dusty Rhodes October 13, 2025
From the first coat of paint you used to freshen up your house’s trim to the stress of wrangling your way to a deal, you’ve been through a lot in that place. Now you’ve made it to the final hurdle of selling a home: moving out! Don’t worry, this is the easy part… but you want to do it right. Here’s how to get through the last leg of your journey without any bumps along the way. How to move out on time Once the paperwork is signed at closing, the buyers will officially own the house—and you won’t. That means that, technically, if you or your stuff is still there after the close, “the buyer could evict you,” says Joshua Jarvis , founder of Jarvis Team Realty in Duluth, GA. So make sure to have your exit strategy in place! Still, most buyers will understand if you need a bit more time and have a legitimate reason—like if you can’t move until the weekend due to your work schedule. Just be sure to discuss these issues as soon as possible before the close, so your buyers can plan accordingly. Decide what to leave behind To make sure you’re leaving behind everything the buyer wanted—and that you agreed to—double-check the closing documents . There should be an itemized list of what comes with the house . And even if the buyers didn’t formally request them, it’s just good form to leave certain types of things behind. Such as? “Generally speaking, you should leave anything that’s bolted to the wall,” says Jarvis. “Some homeowners want to take their fans and blinds to the next home, but generally if it’s screwed in, it stays.” Also, if you and the buyers agreed to transfer any services—such as alarm monitoring or pest control —be sure to set that up before you go. Leave the buyers a detailed note in the house, or ask your agent to get in touch with theirs to make sure the transfer goes smoothly. If you do inadvertently take an item that the buyers had requested, they have the right to ask for it back—and they could potentially sue you in civil court for the cost of a replacement. So, when in doubt, feel free to check with the buyers before you grab and go. But don’t leave anything else behind Just as important as what you leave behind is what you don’t. Your buyers have a right to move into a home that’s been cleared of furniture and other movable items they didn’t expressly request. “Some folks leave all kinds of unwanted clothes, furniture, paint cans, and other items, thinking they are helping the buyers,” Jarvis says. If you truly think your buyers might love to have your old planting pots or kiddie equipment, go ahead and ask—but please don’t assume they’ll welcome your leftovers. Even if you’re careful, you might forget something—at which point the buyers may contact their agent to get it back to you, but they also have the legal right to just keep or get rid of it. So double-check areas (e.g., the attic, garage, basement, storage shed, kitchen, and bathroom drawers) where people commonly overlook items. Clean up It’s common courtesy to leave the place not only clear of your possessions but also clean. However, that doesn’t mean you have to leave it immaculate. “Generally, you shouldn’t have to pay to have it deep cleaned,” Jarvis says. In most cases, a simple broom-clean will do. That means wiping down the countertops, cleaning out drawers, sweeping or vacuuming all the floors, and giving the bathroom and kitchen appliances a once-over so the new owners aren’t grossed out when they arrive. Are you forgetting anything? Before you close the door for the last time, run through a quick checklist. Did you eyeball every room for stray items? Have you forwarded your mail and turned off the utilities? Is the water running in the jacuzzi? We all get in a bit of a rush even in the best planned moves, but you won’t be able to get back in, so it can’t hurt to do a final run-through before you move out. Once you’re ready, it’s time to leave. You can drop a line to your real estate agent to let them know you’re out, although it’s usually a courtesy more than a necessity. If you’re feeling truly gracious, feel free to leave a note, card, or bottle of bubbly congratulating the people who’ve inherited your former home. Given all the fond memories you’ve built between those walls, wouldn’t it be nice to start the home’s new owners off on the right foot? And buy yourself some Champagne, too. Make it the good stuff—you’ve earned it. 
By Dusty Rhodes October 6, 2025
Buying a home is an exciting time, whether this is your first time purchasing a house or you’re a repeat buyer. But if you’ve owned a home before, you may be wondering if you can be a first-time home buyer again. In some cases, yes, you can. In this Redfin article, we’ll go over what qualifications you need to meet and when you can be considered a first-time homebuyer again. Whether you’re buying a home in Atlanta, GA , or a condo in Portland, OR , read on to find out if you’re eligible to be a first-time homebuyer twice. Key takeaways Usually, you’re a first-time homebuyer again if you haven’t owned a home in 3 years. Some special situations may also qualify you as a first-time buyer. Benefits include down payment and closing cost assistance and lower interest rates. When are you considered a first-time homebuyer again? Typically, you’re considered a first-time homebuyer again if you have not owned a primary residence for at least three years. There are several additional reasons you may qualify as a first-time homebuyer again, which we’ll explore below. Some first-time homebuyer programs have different definitions of “first-time homebuyer,” so check with the specific program before proceeding. Qualifications to be considered a first-time homebuyer There are other reasons you may qualify as a first-time homebuyer twice. Let’s take a look at them: You haven’t owned a primary residence for 3 years: This means if you owned a home, but sold it and rented for 3 (or more) years, you can be considered a first-time home buyer again. If you’re buying with another person, only one of you needs to meet the criteria to use most first-time home buyer programs. You’re a single-parent buying on your own: If you’ve never purchased a home by yourself and are a divorced single-parent, you may qualify again. Even if you purchased a home with your former spouse, you likely still meet the criteria. You’re a displaced homemaker/family caregiver: If you are a displaced homemaker who doesn’t or didn’t earn wages from employment and has only owned a home with a former spouse, you’re likely considered a first-time homebuyer. You previously owned a mobile home: If you owned a mobile home or property not affixed to a foundation, then you likely qualify. Your previous home was out of compliance: If your home had building code violations or safety issues that could not be repaired or brought into compliance for less than the home’s value, you’re likely eligible. Benefits of being a first-time homebuyer again There are benefits to being a first-time homebuyer twice. Let’s take a look at them: Access to first-time homebuyer programs: One of the biggest benefits is the ability to use first-time homebuyer programs such as down payment and closing cost assistance , grants, credits, or loans. Every program has different qualifications, so make sure to research each program or speak with your agent and lender to explore options. Options for low down payment mortgages: There are several loans available for first-time buyers that offer lower down payment amounts. For example, Freddie Mac’s Home Possible and Fannie Mae’s Home Ready offer down payment amounts as low as 3%. Potentially lower mortgage rates: Sometimes, lenders will offer slightly lower mortgage rates to first-time borrowers to help them buy their first home. FAQs about first-time homebuyers Can I be a first-time homebuyer again if I previously owned a home? Yes, as long as you haven’t owned a primary residence in the last 3 years, or you owned a home while previously married. Do both homebuyers need to be first-time homebuyers to qualify? No, in most cases, as long as one homebuyer meets the qualifying criteria, then you’re considered a first-time homebuyer. However, some programs require both homebuyers to be first-timers. Can I qualify for a first-time homebuyer loan again? Yes, for the most part, if you qualify as a “first-time homebuyer,” you can get another first-time homebuyer loan. Every lender and loan is different, so be sure to read the eligibility criteria thoroughly. Are there income limits for programs? Yes, many first-time homebuyer programs have income limits. This means you won’t qualify if you make more than the specified annual amount.
By Dusty Rhodes September 29, 2025
Enhancing your living space doesn’t always require a hefty budget. With the right updates, you can add real value to your home for under $1,000. Whether you’re preparing to sell your home in Grand Rapids, MI , or looking for some easy DIY projects for your house in Portland, OR , these cost-effective upgrades can breathe new life into your space. To dig deeper into this topic, we spoke with Kevin Brasler, executive editor at nonprofit Consumers’ Checkbook , a consumer advocacy group that helps homeowners save money and make smart choices. With decades of experience evaluating service providers, Kevin shares insights on how to budget wisely, avoid common renovation mistakes, and know when to hire a professional versus taking the DIY route. 1. Add fresh paint to the walls of your home Painting is one of the most affordable ways to refresh your home. A gallon of quality paint costs $30 to $50, with a full room averaging around $350 . Neutral shades like gray, beige, or white appeal to most buyers, while accent colors such as navy, forest green, or mustard add personality. For a calming vibe, try sage or powder blue. Brasler notes that painting is one of the best DIY-friendly projects homeowners can take on. “Good DIY projects are those that involve mostly labor: painting, basic tile work, installing fixtures that don’t require new wiring or plumbing, landscaping, and most flooring jobs,” he says. 2. Update your cabinet hardware A cabinet hardware update is a subtle yet effective strategy to elevate your home’s functionality and aesthetic appeal. Swapping outdated or generic cabinet handles and knobs for modern, stylish alternatives instantly transforms kitchens and bathrooms. Consider sleek brushed nickel handles for a contemporary touch, or opt for vintage-inspired brass knobs for a timeless charm. This modest investment typically costs between $2 to $10 per piece. 3. Change the kitchen backsplash A new backsplash can quickly refresh your kitchen while protecting your walls. A custom kitchen backsplash protects your walls from daily wear and creates a focal point that elevates the entire room. Opt for affordable ceramic or glass tiles, which can be found for as low as $1 to $5 per square foot. Staying within a $1,000 budget for a standard-sized kitchen is doable with those materials. Or you can go for a peel-and-stick backsplash that is not only budget-friendly, but a quick solution to make your kitchen stand out. Brasler stresses that getting multiple estimates is critical for even small-scale projects like this. “The biggest mistake homeowners make is not getting multiple bids. Even for smaller projects, you should get at least three written estimates; five is better,” he explains. 4. Switch to energy-efficient lighting By making the switch to energy-efficient lighting, you’ll not only improve the sustainability of your home but also create a more comfortable and inviting living environment. Switching to LED bulbs, which typically cost between $2 to $10 each, saves energy and reduces utility bills over time. Beyond the financial benefits, the crisp and vibrant illumination of energy-efficient lighting can effortlessly enhance your home’s overall mood and appeal. 5. Create a beautiful landscape A simple landscaping update is another low-cost project that adds value. Try planting vibrant flowers, shrubs, and trees, which can cost anywhere from $100 to $500, depending on the size and variety. Add mulch or decorative stones to create a polished look for approximately $50 to $150, while adding affordable outdoor lighting options typically range from $50 to $200. Low-maintenance features lower costs down while still making a strong impression. For most landscaping updates, DIY is both practical and cost-effective. Still, Brasler advises calling in professionals for anything involving gas, high-voltage electrical, or structural work. 6. Install a smart thermostat A smart thermostat, such as popular models like Nest or Ecobee, typically costs between $150 to $300, depending on the brand and features. Homeowners can often handle the installation themselves, avoiding additional labor costs. Once installed, these intelligent devices learn your preferences, allowing for automated temperature adjustments, and can be controlled remotely via smartphone apps. 7. Refurbish or paint the front door Refresh your curb appeal by refurbishing or painting the front door – a low-cost project with instant impact. Sanding and restaining often costs under $100 and requires just a few materials. Another choice is to use high-quality exterior paint, which typically ranges from $30 to $50 per gallon, providing a fresh, vibrant color that suits your home’s style. 8. Add floating shelves or built-ins Consider adding floating shelves or built-in storage solutions to maximize space and keep your home organized. Floating shelves, available for as little as $20 to $50 per shelf, provide an affordable and stylish way to showcase decor or organize essentials. For a more customized approach, DIY built-ins can be crafted using plywood or ready-to-assemble shelving units, typically ranging from $100 to $300. 9. Upgrade your kitchen sink and faucet Breathe new life into your kitchen with a sink and faucet upgrade. Faucets usually run $100 to $300, and sinks $200 to $500. Consider a sleek pull-down faucet and a resilient stainless steel or granite composite sink to improve both function and style. Spending $300 to $800 on a sink and faucet upgrade can instantly refresh your kitchen’s look and make daily tasks easier. 10. Add safety measures to protect your home Smart security cameras or a basic surveillance system now offer affordable and effective protection. Investing in a home surveillance system, typically from $200 to $500, allows real-time monitoring and deterrence against potential threats. The addition of smart cameras, with features like motion detection and remote access via smartphone apps, can improve your home’s overall safety and convenience. With a budget-conscious investment of $500 to $1,000, you can create a comprehensive security network covering critical areas of your property. Tips for finding good contractors Even for smaller projects, working with contractors requires careful planning. Brasler emphasizes the value of comparison shopping. “Get proposals and detailed pricing from at least three reputable, licensed contractors,” he advises. “The only way to ensure you’re paying a fair price is to initiate competition.” He also suggests: Check references thoroughly. Ask questions like: Did the company follow plans? Did it finish on time? Was the work professional? Did the contractor offer low-cost solutions and stick to agreed prices? Were problems handled promptly and effectively? Did the team communicate clearly throughout the project? Was disruption to your daily life kept to a minimum? Did the finished results meet your expectations for quality and appearance? Was the contractor flexible and fair about changes if you adjusted plans? Ask neighbors and friends for referrals. Word-of-mouth often uncovers the best local contractors. Look for complaints. Check ratings at Checkbook.org or your local Better Business Bureau and be cautious with online reviews as they can’t always be trusted. Common mistakes when budgeting for small renovations Brasler states the biggest budgeting mistake is skipping multiple bids. “A contractor charging $800 might be using premium materials while the $500 bid uses builder-grade stuff. Try to get prices from each business for the exact same work,” he explains. He also reminds homeowners not to assume that a low price means low quality. “For decades we have evaluated all kinds of businesses and often find some of the best companies have the lowest prices,” he says. When to DIY vs. hire a pro While DIY saves money, Brasler stresses knowing your limits. “Call in pros to deal with anything involving gas, high-voltage electrical, or structural changes. Ditto for work that requires a permit and inspection,” he advises. For tasks like painting, basic landscaping, or adding shelves, homeowners can usually manage on their own. Keep expectations realistic since DIY projects often take longer and may not match professional results. The bottom line Budget-friendly renovations under $1,000 can make a big difference in your home’s look, comfort, and value. From painting and landscaping to updating fixtures and adding smart technology, these projects prove you don’t need to overspend to refresh your space. As Brasler reminds homeowners, “the key is balancing creativity with caution.” By comparing bids, avoiding common budgeting mistakes, and knowing when to call in the pros, you can achieve lasting results without stretching your wallet.