How to Clean a Concrete Patio to Remove Tough Stains

Dusty Rhodes • June 20, 2022

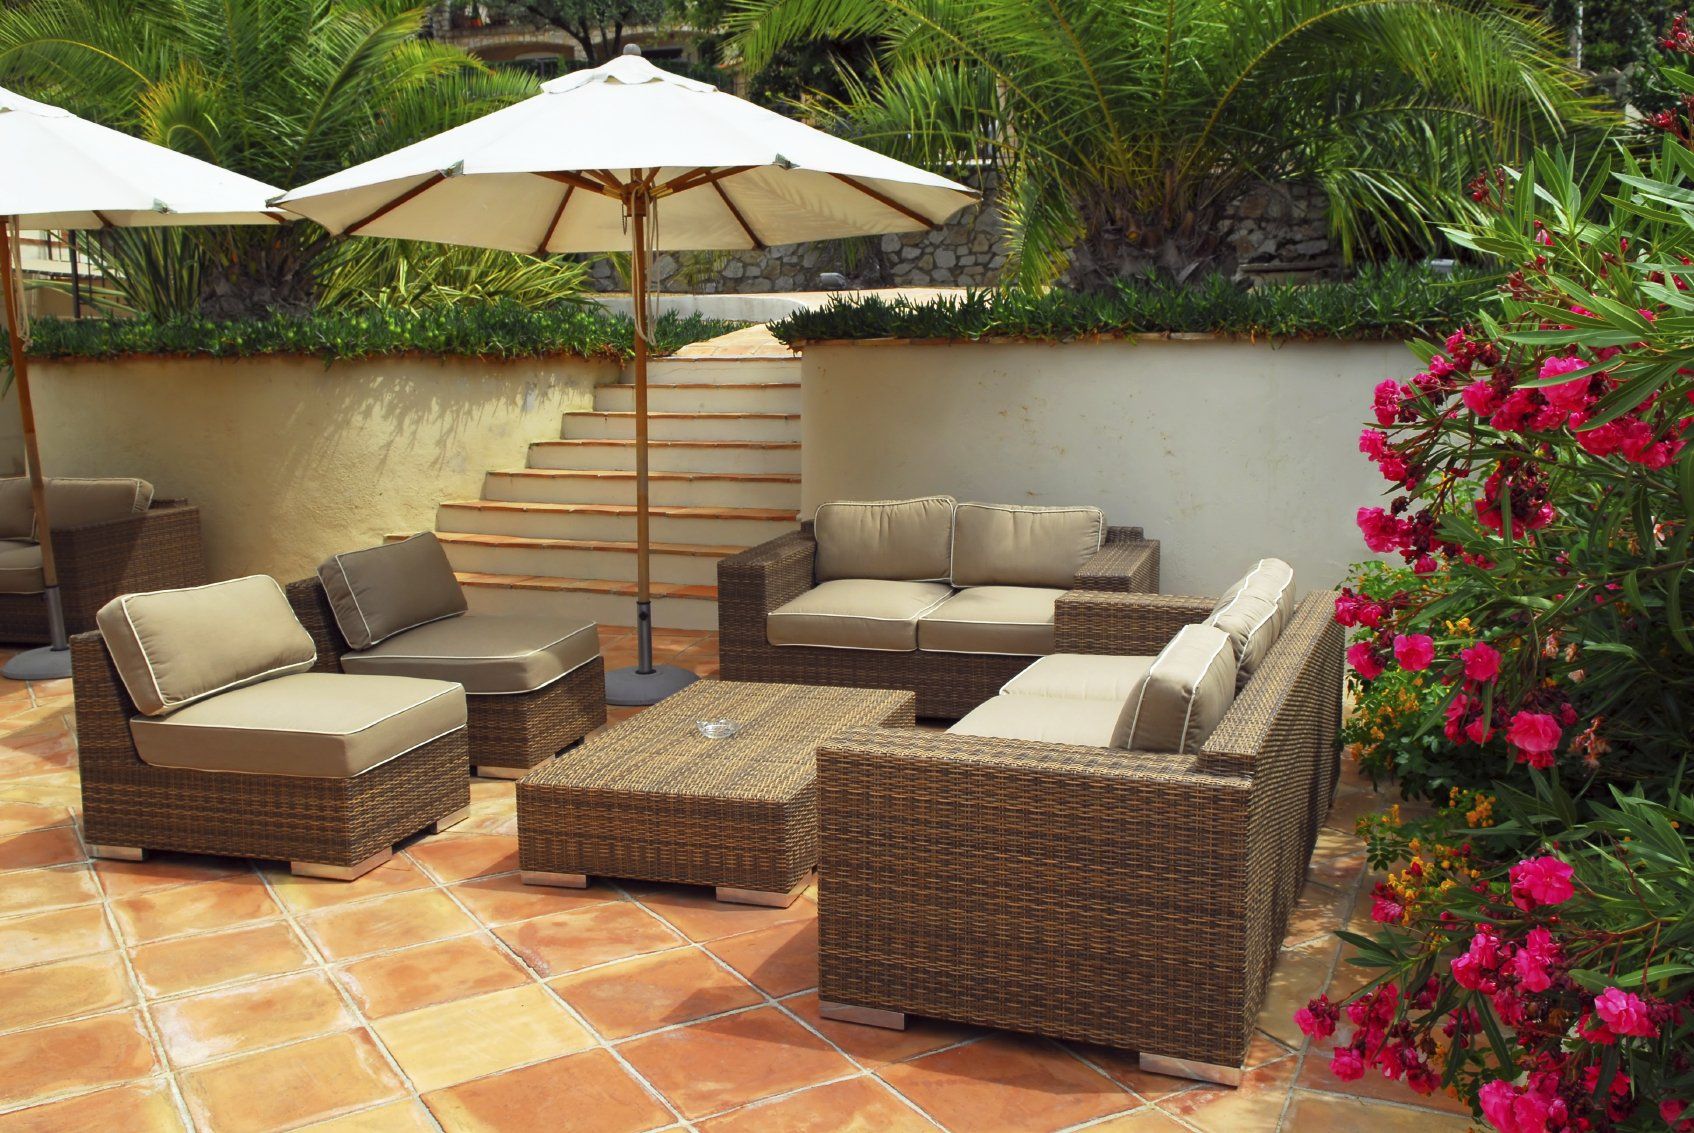
Concrete patios are durable, inexpensive, and low-maintenance. However, dirt, debris, and food can blemish these tough surfaces over time. Here’s how to clean a cement patio and remove unsightly stains.


There are many elements that can stain your patio. Regular foot traffic can track dirt, grime, and grease over outdoor cement flooring. Plus, concrete patios are exposed to harsh weather and lots of use during warmer months. This can leave your walkway, cement deck, concrete pavers, and other patio features looking less than ideal. Regular cleaning and maintenance, however, can restore your cement patio and ensure it looks beautiful for years to come. 


Whether you are spring cleaning or removing stuck-on stains, here's how to clean a concrete or cement patio easily—with or without a pressure washer.


How to Clean a Concrete Patio

What You'll Need

  • Broom or leaf blower
  • Sponge or mop
  • Tarp
  • Scrub brush
  • Garden hose
  • Spray bottle or bucket
  • Cleaning solution (see below for options)
  • Protective gear, including rubber gloves, safety goggles, and respirator (as needed based on cleaning method)

Step 1: Remove Loose Dirt and Debris

Remove any furniture, grills, or planters from the patio so that the entire surface is visible. Sweep away loose dirt, debris, or leaves. Cover any nearby plants or landscaping with a tarp for protection.


Step 2: Treat Patio Stains

Water stains, mold, and mildew: Use a garden hose or pressure washer to remove water stains or mildew. If this doesn't do the trick, mix a solution of 3/4 cup bleach and 1 gallon water. Wearing protective gear, including rubber gloves, scrub the area with a brush. Rinse thoroughly with clean water. Ensure the patio is fully dry before putting decorative items or furniture back in place.

Grease and oil stains: Sprinkle sawdust, cornstarch, or baking soda on the stain to absorb any spills. You can also mix baking soda with a bit of water to create a cleaning paste. Scrub it gently into the stain and let it sit for 30-60 minutes. Then wash away the solution or sweep away any remaining powder.


Remember: Concrete is porous. If the oil stain is old, it might have penetrated the surface. Try using a degreaser to remove old grease stains from a concrete patio, following the manufacturer's instructions.


Rust stains: White vinegar is a practical, eco-friendly way to remove rust stains from cement patios. Spray it directly onto the stain and let it to sit for less than an hour to penetrate deep stains. Scrub with a stiff-bristle brush. If the concrete was made to look like stone or designed with a grain, try to brush in line with the original surface to avoid any unsightly scratches. Rinse with water and let it dry. If the stain doesn't improve, repeat the process, or try a concrete rust remover.


Step 3: Clean Patio Floors

Dish soap and water: Dish soap is a degreaser, and it works well to clean oily and grimy concrete. Create a cleaning solution of warm water and few drops of dish soap and apply it to the surface. Let it sit for a while, then mop the patio and rinse it with fresh water. Repeat the process as many times as needed.


Vinegar or baking soda: These natural cleaners work well to clean cement patios with stubborn charcoal or rust spots. Mix equal parts vinegar and water, scrub the patio with the mixture, then give it a good rinse. If stains don't dissolve, try undiluted vinegar. Do not use vinegar and baking soda mixture in a power washer. And be sure to protect your hands, eyes, and nose to minimize any irritation.


Oxygen bleach: Wear rubber gloves. Use a cup to sprinkle the solution over the entire patio. Scrub it using a push broom or soft-bristle mop. Let it sit for about 10 minutes, then rinse it off thoroughly with fresh water from the hose. Never mix bleach with other cleaning agents.


Concrete cleaner or degreaser: These are typically made from concentrated alkaline soap to loosen oil. Although they can be effective for porous concrete, they might not work well on old stains.


Pressure washer: Pressure washers can effectively clean concrete patios and are widely available to rent or purchase. If you are unsure which pressure setting is best, test the power washer on a small area first to see the effects. If you choose to use a power washer, opt for a store-bought solution.


Muriatic acid: This substance is commonly used on driveways or garage floors where oil leaks from a car have stained the concrete. When used carefully, muriatic acid can remove mineral, oil, paint, and rust stains, while also brightening concrete. Be cautious as this acid is dangerous and can kill plants and grass. Use protective gear, including a respirator, to protect against dangerous contact and fumes. Follow the manufacturer's instructions for best practices.


Prevent Patio Stains in the First Place


A concrete sealer is the best option to avoid stains on a cement patio. If you're up for the challenge, apply them yourself using a paint sprayer or roller. Otherwise, call a professional.


Clean outdoor concrete floors annually. This is also a great time to inspect the deck for damage and make any necessary repairs before beginning the cleaning process.


If you're not sure what to use to clean your concrete patio, test a shaded or inconspicuous area to make sure that a cleaning solution won't discolor the patio or etch the concrete. Once you've perfected the method, use protective gear, and take all necessary precautions to finish cleaning the entire patio.


Source: BHG


Dusty Rhodes Properties is the Best Realtor in Myrtle Beach! We do everything in our power to help you find the home of your dreams. With experience, expertise, and passion, we are the perfect partner for you in Myrtle Beach, South Carolina. We love what we do and it shows. With more than 22 years of experience in the field, we know our industry like the back of our hands. There’s no challenge too big or too small, and we dedicate our utmost energy to every project we take on. We search thousands of the active and new listings from Aynor, Carolina Forest, Conway, Garden City Beach, Longs, Loris, Murrells Inlet, Myrtle Beach, North Myrtle Beach, Pawleys Island, and Surfside Beach real estate listings to find the hottest deals just for you!

Share

By Dusty Rhodes November 10, 2025
If there was one simple step that could help make your home sale a seamless process, wouldn’t you want to know about it? There’s a lot that happens from the time your house goes under contract to closing day. And a few things still have to go right for the deal to go through. But here’s what a lot of sellers may not know. There’s one part of the process where some homeowners are hitting a road bump that’s causing buyers to back out these days. But don’t worry. The majority of these snags are completely avoidable, especially when you understand what’s causing them and how to be proactive. That’s where a great agent (and a little prep) can make all the difference. What’s Causing Some Buyers To Back Out The latest data from Redfin says 15% of pending home sales are falling through . And that’s not wildly higher than the 12% norm from 2017-2019. But it is an increase. That means roughly 1 in 7 deals today don’t make it to the closing table. But, at the same time, 6 out of 7 do. So, the majority of sellers never face this problem – and odds are, you won’t either. But you can help make it even less likely if you know how to get ahead. You might assume the main reason buyers are backing out today is financing. But that’s actually not the case. The most common deal breaker today, by far, is inspection and repair issues (see graph below):
By Dusty Rhodes November 3, 2025
You’ve got big plans for 2026. But what you do this year could be the difference between a smooth sale and a stressful one. If you’re thinking of selling next spring (the busiest season in real estate), the smartest move you can make is to start prepping now. As Realtor.com says : “If you’re aiming to sell in 2026, now is the time to start preparing , especially if you want to maximize the spring market’s higher buyer activity.” Because the reality is, from small repairs to touch-ups and decluttering, the earlier you start, the easier it’ll be when you’re ready to list . And, the better your house will look when it’s time for it to hit the market. Why Starting Now Matters Talk to any good agent and they’ll tell you that you can’t afford to skip repairs in today’s market. There are more homes for sale right now than there have been in years. And since buyers have more to choose from, your house is going to need to look its best to stand out and get the attention it deserves. Now, that doesn’t mean you have to do a full-on renovation. But it does mean you’ll want to tackle some projects before you sell. Your house will sell if it’s prepped right. And you don’t want to be left scrambling in the spring to get the work done. Because here’s the advantage you have now. If you start this year, you’ll be able to space those upgrades and fixes out however you want to. More time. Less stress. No sense of being rushed or racing the clock. Whether it’s fixing that leaky faucet, repainting your front door, or finally replacing your roof, you can do it right if you start now. And you have the time to find great contractors without blowing your budget or paying extra for rushed jobs. Get an Agent’s Advice Early To figure out what’s worth doing and what’s not in your market, you need to talk to a local agent early. That way you’re not wasting your time or money on something that won’t help your bottom line. As Realtor.com explains : “Respondents overwhelmingly agree that both buyers and sellers enjoy a smoother, more successful experience when they start early. In fact, a recent survey reveals that, for sellers, bringing a real estate agent into the process sooner can pay off significantly. ” A skilled agent can tell you: What buyers in your local area are looking for The repairs or updates you need to do before you list How to prioritize the projects, if you can’t do them all Skilled local contractors who can help you get the work done And having that information up front is a game changer. To give you a rough idea of what may come up in that conversation, here are the most common updates agents are recommending today, according to research from the National Association of Realtors (NAR): 
By Dusty Rhodes October 13, 2025
From the first coat of paint you used to freshen up your house’s trim to the stress of wrangling your way to a deal, you’ve been through a lot in that place. Now you’ve made it to the final hurdle of selling a home: moving out! Don’t worry, this is the easy part… but you want to do it right. Here’s how to get through the last leg of your journey without any bumps along the way. How to move out on time Once the paperwork is signed at closing, the buyers will officially own the house—and you won’t. That means that, technically, if you or your stuff is still there after the close, “the buyer could evict you,” says Joshua Jarvis , founder of Jarvis Team Realty in Duluth, GA. So make sure to have your exit strategy in place! Still, most buyers will understand if you need a bit more time and have a legitimate reason—like if you can’t move until the weekend due to your work schedule. Just be sure to discuss these issues as soon as possible before the close, so your buyers can plan accordingly. Decide what to leave behind To make sure you’re leaving behind everything the buyer wanted—and that you agreed to—double-check the closing documents . There should be an itemized list of what comes with the house . And even if the buyers didn’t formally request them, it’s just good form to leave certain types of things behind. Such as? “Generally speaking, you should leave anything that’s bolted to the wall,” says Jarvis. “Some homeowners want to take their fans and blinds to the next home, but generally if it’s screwed in, it stays.” Also, if you and the buyers agreed to transfer any services—such as alarm monitoring or pest control —be sure to set that up before you go. Leave the buyers a detailed note in the house, or ask your agent to get in touch with theirs to make sure the transfer goes smoothly. If you do inadvertently take an item that the buyers had requested, they have the right to ask for it back—and they could potentially sue you in civil court for the cost of a replacement. So, when in doubt, feel free to check with the buyers before you grab and go. But don’t leave anything else behind Just as important as what you leave behind is what you don’t. Your buyers have a right to move into a home that’s been cleared of furniture and other movable items they didn’t expressly request. “Some folks leave all kinds of unwanted clothes, furniture, paint cans, and other items, thinking they are helping the buyers,” Jarvis says. If you truly think your buyers might love to have your old planting pots or kiddie equipment, go ahead and ask—but please don’t assume they’ll welcome your leftovers. Even if you’re careful, you might forget something—at which point the buyers may contact their agent to get it back to you, but they also have the legal right to just keep or get rid of it. So double-check areas (e.g., the attic, garage, basement, storage shed, kitchen, and bathroom drawers) where people commonly overlook items. Clean up It’s common courtesy to leave the place not only clear of your possessions but also clean. However, that doesn’t mean you have to leave it immaculate. “Generally, you shouldn’t have to pay to have it deep cleaned,” Jarvis says. In most cases, a simple broom-clean will do. That means wiping down the countertops, cleaning out drawers, sweeping or vacuuming all the floors, and giving the bathroom and kitchen appliances a once-over so the new owners aren’t grossed out when they arrive. Are you forgetting anything? Before you close the door for the last time, run through a quick checklist. Did you eyeball every room for stray items? Have you forwarded your mail and turned off the utilities? Is the water running in the jacuzzi? We all get in a bit of a rush even in the best planned moves, but you won’t be able to get back in, so it can’t hurt to do a final run-through before you move out. Once you’re ready, it’s time to leave. You can drop a line to your real estate agent to let them know you’re out, although it’s usually a courtesy more than a necessity. If you’re feeling truly gracious, feel free to leave a note, card, or bottle of bubbly congratulating the people who’ve inherited your former home. Given all the fond memories you’ve built between those walls, wouldn’t it be nice to start the home’s new owners off on the right foot? And buy yourself some Champagne, too. Make it the good stuff—you’ve earned it.